Ultimate Trail Work Guide: Hand Tools
Trail builder jargon can be intimidating, especially when it comes to hand tools. SCMTS is here to help! In this blog you will find a list of the most common hand tools we use daily in the field, with descriptions of how and when we use them. After reading this blog we know you’ll be excited to join us in the field and try out newly learned techniques.
Enjoy!
Digging Tools:
Mcleod
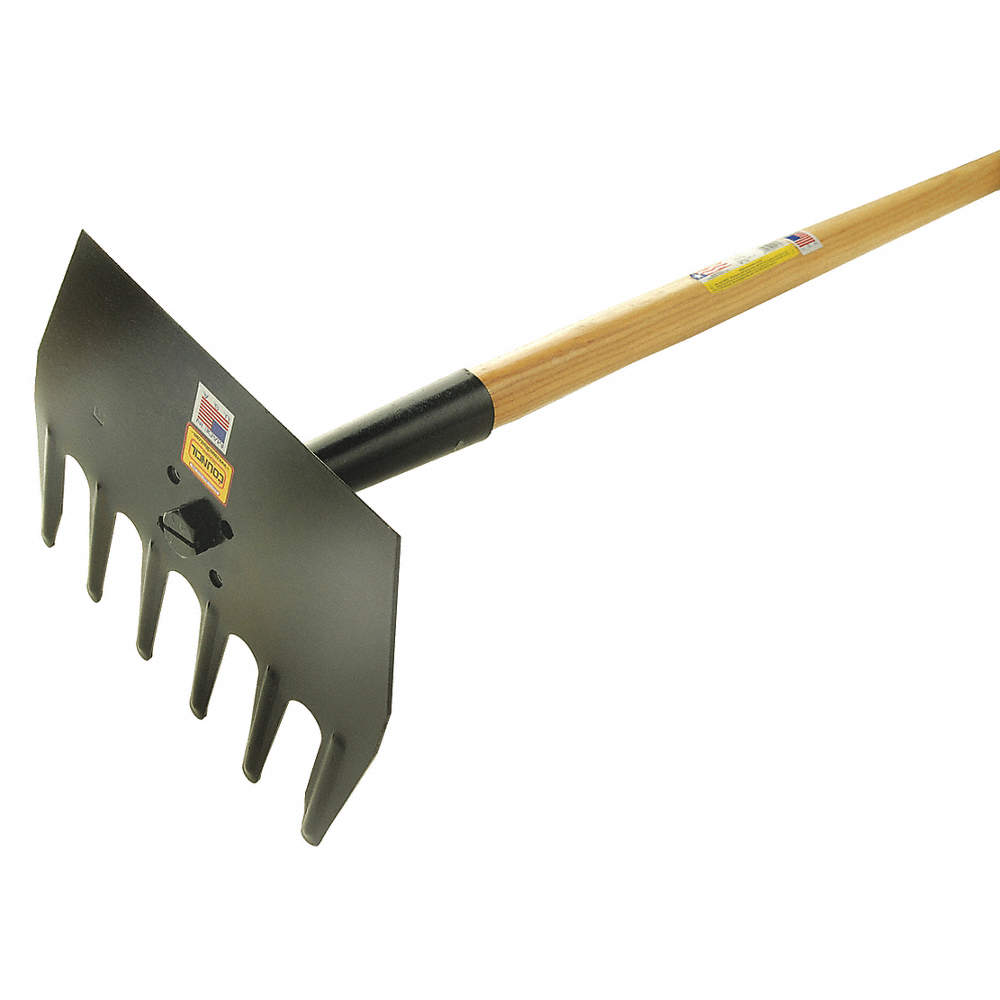
Use: This tool is used for raking or dragging soil and small rocks. The side of this tool without teeth can be used to chop small roots as well as rake out soil/rocks.
Helpful techniques: This tool works best when a trail worker bends over with proper form and uses both hands to drag this tool along the soil. Because this tool is sharp do not swing this tool over your head and make sure to be aware of others nearby when using.
Maintenance: Frequently check to make sure the metal part of this tool is firmly attached to the wood handle. Proper use will avoid degradation of this tool. Clean off wet soil prior to storing.
——————
Rogue Hoe
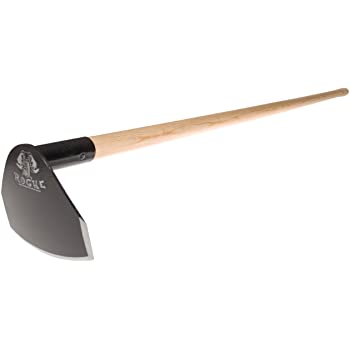
Use: This tool is used for digging or removing soil.
Fun fact: They are made from recycled agricultural discs.
Helpful techniques: This tool works best when a worker bends over with proper form and raises the tool a few feet off the ground before striking the earth. Because this tool is sharp do not swing this tool over your head and make sure to be aware of others nearby when using.
Maintenance: This tool needs frequent sharpening. If your tool is dull, please let SCMTS staff know and they will use an angle grinder to sharpen the tool for you. Volunteers are not allowed to use power tools at SCMTS events. Clean off wet soil prior to storing.
——————
Rake

Use: This tool is used for raking small rocks and soil out of the trail tread.
Helpful techniques: This tool works best when a trail worker bends over with proper form and uses both hands to drag this tool along the soil. Because this tool is sharp do not swing this tool over your head and make sure to be aware of others nearby when using.
Maintenance: Frequently check to make sure the piece of metal with teeth on it is firmly attached to the handle. Proper use will avoid degradation of this tool. Clean off wet soil prior to storing.
——————
Shovel

Use: This tool is used for digging or removing soil. In addition to round point shovels (pictured to the left), we also use flat head shovels. Round point shovels are better for digging, while flat head shovels are better for scooping loose soil.
Helpful techniques: This tool works best when a worker holds the handle firmly with both hands while pressing their boot into the head of the shovel. This will allow the head to enter the soil and then you can press down on the handle to remove the soil. Because this tool is sharp do not swing this tool over your head and make sure to be aware of others nearby when using.
Maintenance: Frequently check to make sure the metal head of the shovel is firmly attached to the handle. Clean off wet soil prior to storing.
——————
Pick Mattock
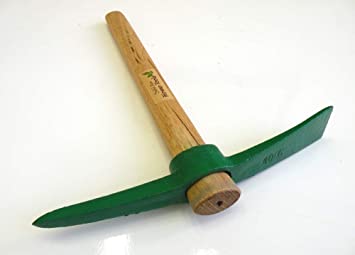
Use: This tool is used to dig out large chunks of soil and can be used to expose and remove roots or rocks in conjunction with the rock bar.
Helpful techniques: Maintain a firm stance while you use both hands to swing this tool firmly into the earth. Because this tool can sometimes be raised above your head extra caution must be taken to watch out for other workers nearby.
Maintenance: Make sure the metal head of this tool is firmly attached to the handle prior to use. Clean off wet soil prior to storing.
——————
Pulaski

Use: This tool is used to cut out large roots or dig out rocks in the trail surface.
Fun fact: The Pulaski was created in the years just following the 1910 Big Burn by U.S. Forest Service Ranger Ed Pulaski, and it continues to be used by wildland firefighters to this day. Read the whole fascinating story on PBS.org here.
Helpful techniques: Maintain a firm stance while you use both hands to swing this tool firmly into the earth. Because this tool can sometimes be raised above your head extra caution must be taken to watch out for other workers nearby.
Maintenance: Because one side of this tool is an axe blade frequent sharpening is needed. Again, ask an SCMTS employee to sharpen the tool for you. Clean off wet soil before storing.
——————
Cutting Tools:
Loppers

Use: This tool is used to cut back brush or vegetation in the trail that is 1” in diameter or less.
Helpful techniques: Use both hands to squeeze the blades together when cutting vegetation. The blades on this tool are sharp so make sure to watch out for other workers.
Maintenance: Trying to cut vegetation greater than 1” in diameter can damage or break this tool. Proper use will avoid degradation of this tool. Clean off debris and vegetation.
——————
Hand Saw
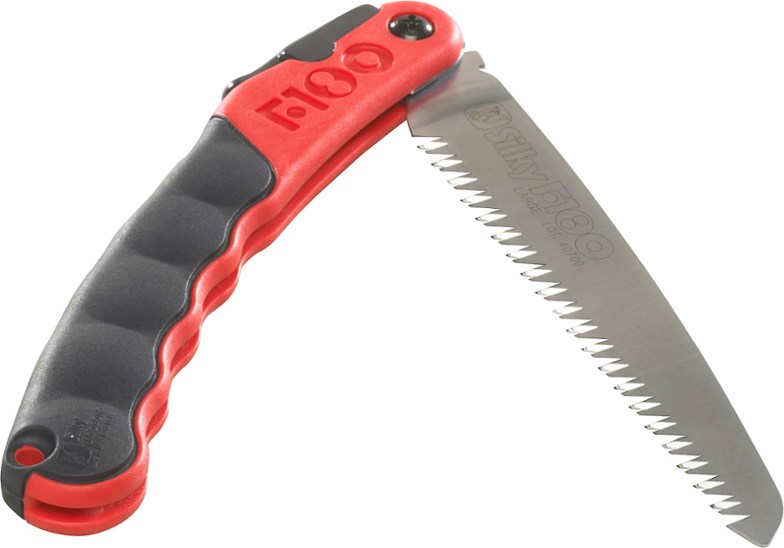
Use: This tool is used to saw through vegetation that is greater than 1” in diameter.
Helpful techniques: Hold the handle of this tool firmly while you grab the vegetation with your other hand for stability. Pull the saw back and forth slowly cutting the vegetation. Make sure to wear gloves, eye protection, and watch out for the hand holding the vegetation stable.
Maintenance: Clean debris and vegetation off of blade before folding back up. Tighten the screw attached to the plastic handle frequently.
——————
Other Tools:
Tamper

Use: This tool is used to compact dirt by pounding the head of the tool into freshly moved soil.
Helpful techniques: Firmly hold the tool with both hands, lift the head of the tool off the ground, and slam the head into the freshly moved soil. If the moisture content in the soil is high, it sometimes helps to cover the soil with a plastic bag before using the tamper. Watch out for your feet as well as those around you.
Maintenance: Frequently check to make sure the metal head of the tool is firmly attached to the handle. Clean off any mud or debris.
——————
Rock Bar
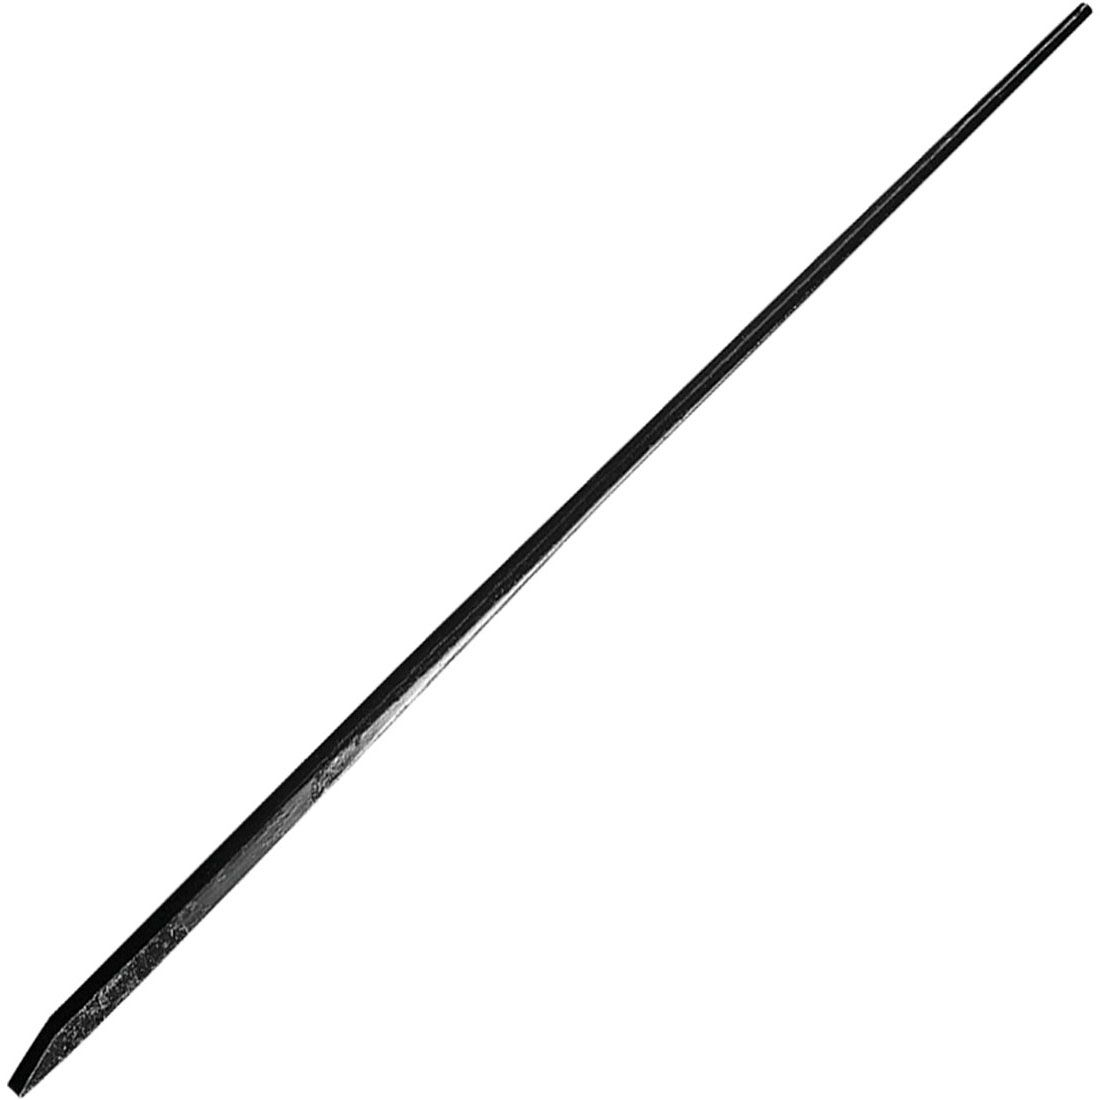
Use: This tool is used to pry up and move large rocks.
Helpful techniques: Maintain a firm stance while you drive the sharp point of the rock bar underneath a rock. Use the bar as a lever to pry up large rocks. This tool is heavy and can hurt others if it lands on top of them. Be careful when wielding this tool and don’t set it standing up right. You can sometimes use a mallet to hammer the end of the rock bar deeper beneath a rock.
Maintenance: Be careful not to bend the tool with excessive force. Remove wet soil prior to storing.
——————
Mallet/Hammer

Use: This tool is used to hammer the end of the rock bar deeper into the soil. If made out of metal this tool can be used to crush rock.
Helpful techniques: Firmly hold the handle of this tool while swinging it at your desired target. Make sure to watch out for fingers and hands. If crushing rock with a metal mallet, make sure to wear eye protection.
Maintenance: Remove wet soil prior to storage.
——————
Hope this overview helped prep you for the next time you join us for a volunteer trail work event. Now that you know all your hand tools, come show off your knowledge out in the field!
Check out our upcoming events by hitting the button below.